
Before we begin, if you would like to follow along I will be using the Work Management Tab in Antero to showcase the different options to Organize a Grid Layout.
Resizing Columns
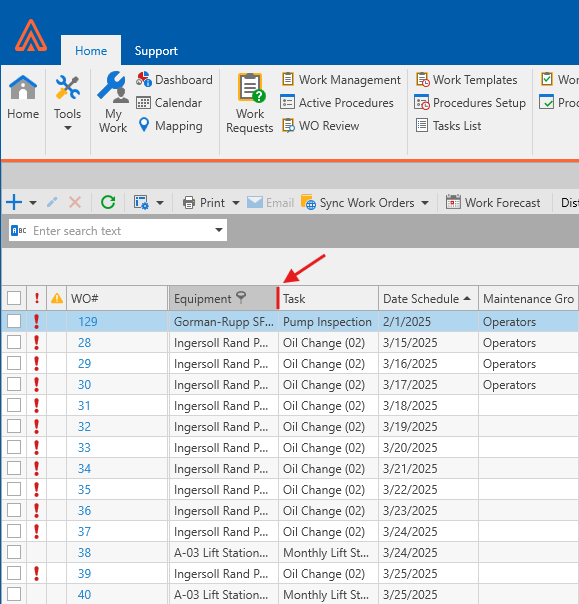
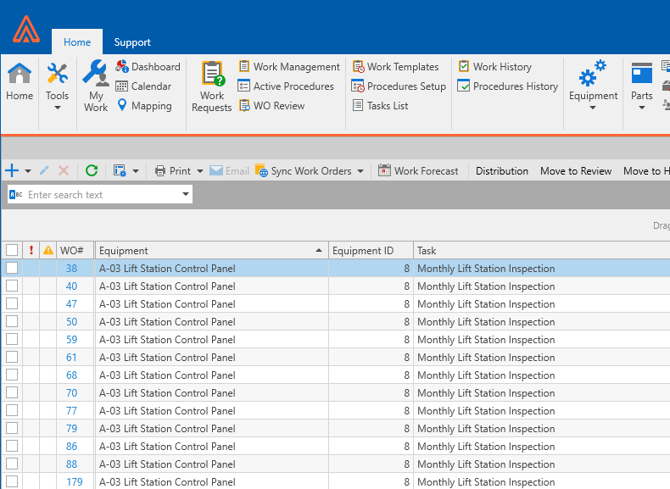
If you hover your mouse over the line between two columns as seen in the image below, you can click and drag to resize the column.
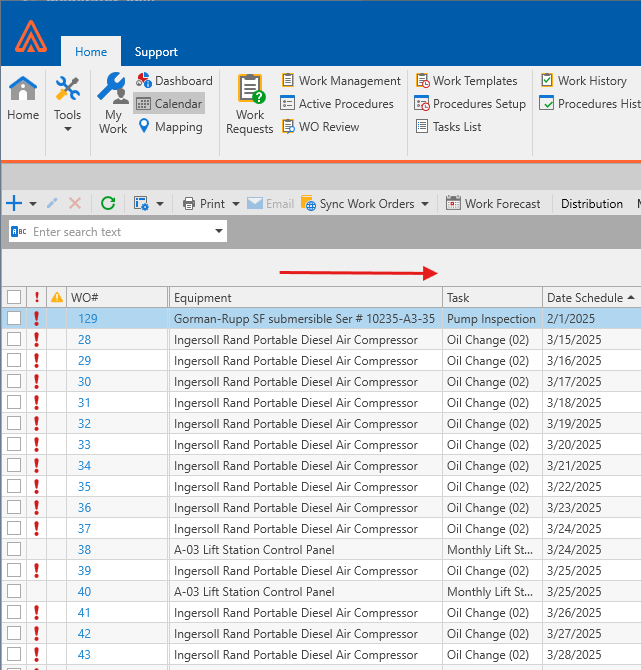
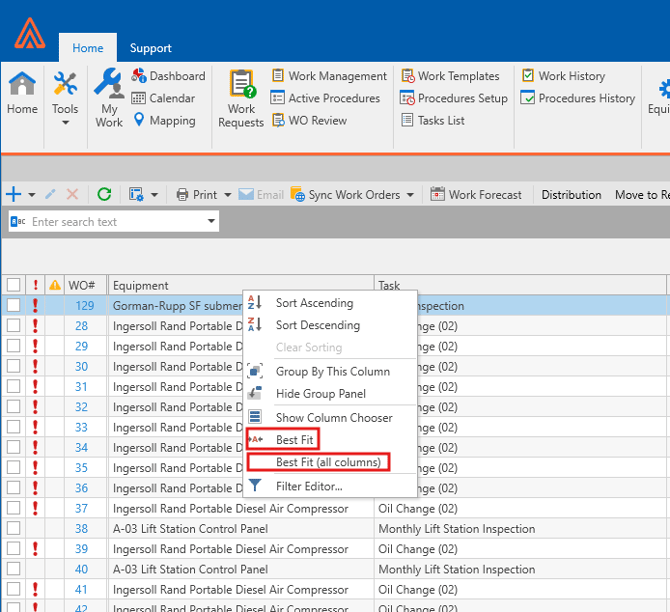
Alternatively, you can right click on the column and choose the Best Fit or Best Fit (all columns) option to automatically expand columns to the length of the longest text field so all data in the columns is visible.
Sorting Columns
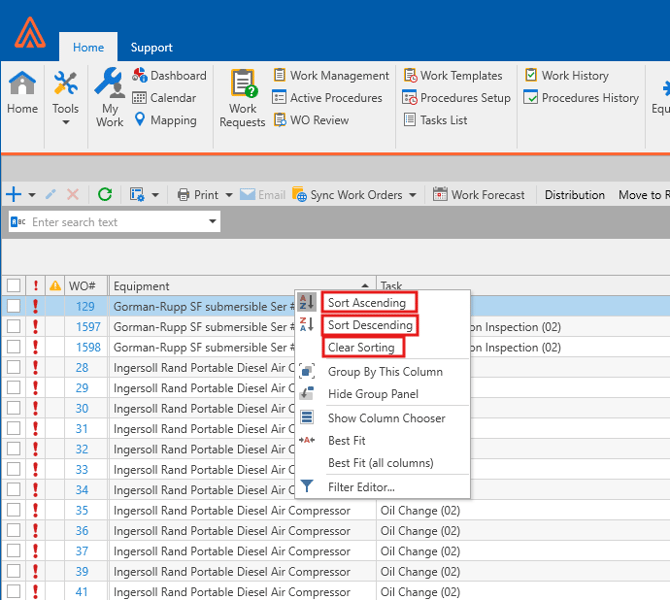
If you click on any column it will toggle between Sorting the data by Ascending and Descending Order.
Alternatively, you can right click a column and choose to Sort by Ascending or Sort by Descending.
In this Right click menu you could also choose to Clear Sorting which will wipe any changes you made to sort a Column.
Grouping Columns
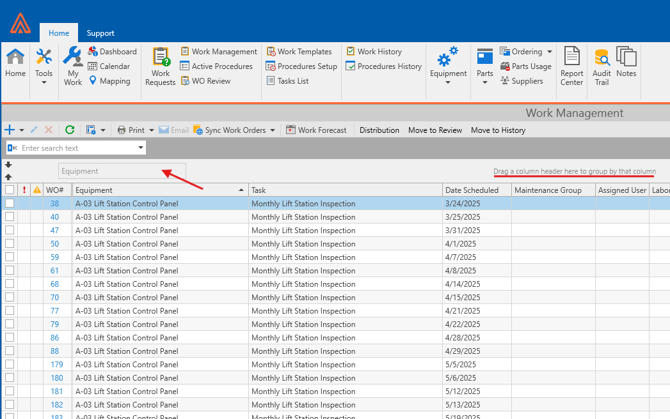
In some cases you may find that the sorting alone isn't enough to find exactly what you are looking for if there is a lot of data. In these cases I recommend using Column Grouping. You can group columns by simply dragging and dropping the Column you would like to Group by in the Column Header.
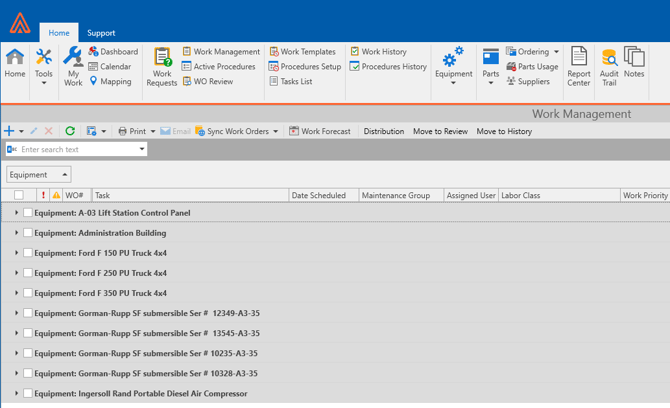
You can drag more than one Column into the header if you are looking to group by more than one category.
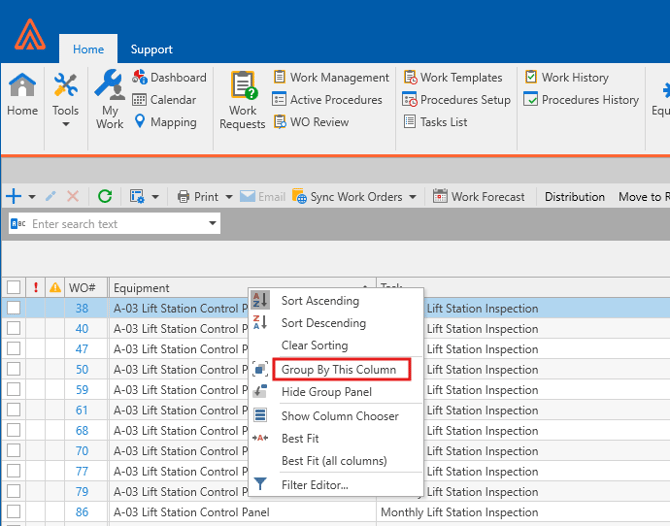
Alternatively, you can right click a column and choose the "Group By This Column" Option.
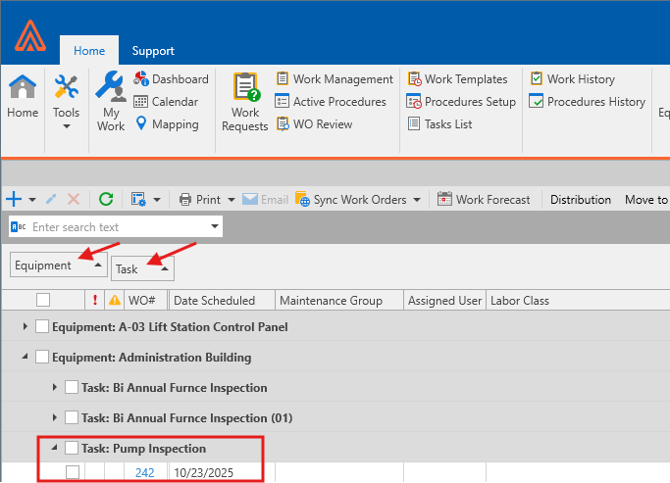
While you have a column grouped you can expand each section to see the data correlating to that Group. For Example, I chose to group by Equipment which separated each piece of Equipment. If I choose to Expand the Administration Building, then all work orders tied to the Administration Building will show.
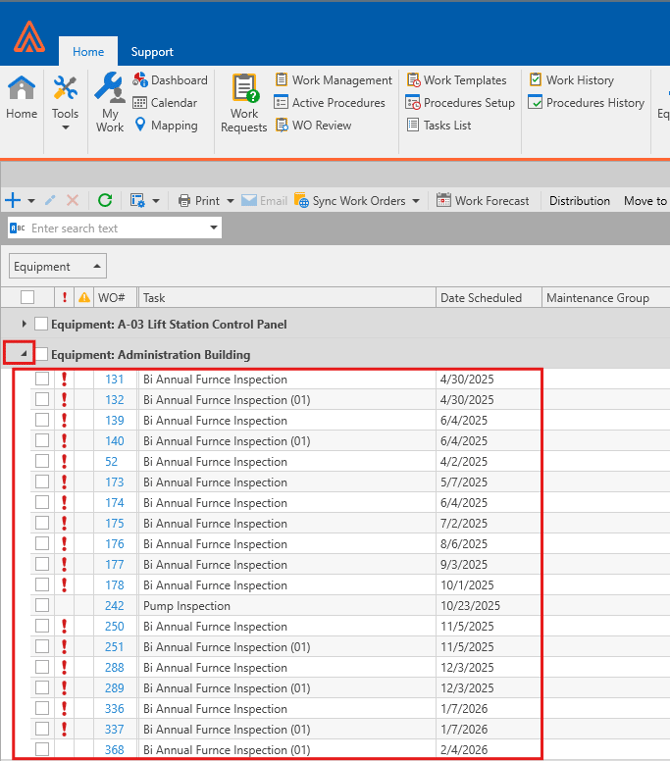
If I was to add another column to the header like "task" for instance, when I expand Equipment, I will also see all the different Tasks that are tied to that piece of Equipment. In the example below I wanted to find if I had any Active Work Orders for Pump Inspections at the Administrative Building. With grouping I was able to locate the 1 Work Order that falls under both this Task and Equipment Name without having to sift through all the Work Orders.
Lastly, You can right click the header to Clear Grouping and return back to the original view.

Column Chooser
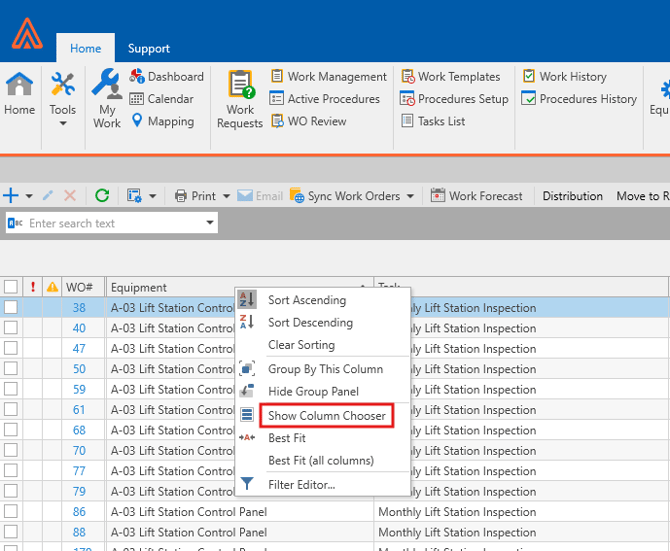
If you find yourself trying to Sort by a specific piece of data that isn't available in the Columns like "Equipment ID" for example. You can right click a column and choose the Show Column Chooser option.
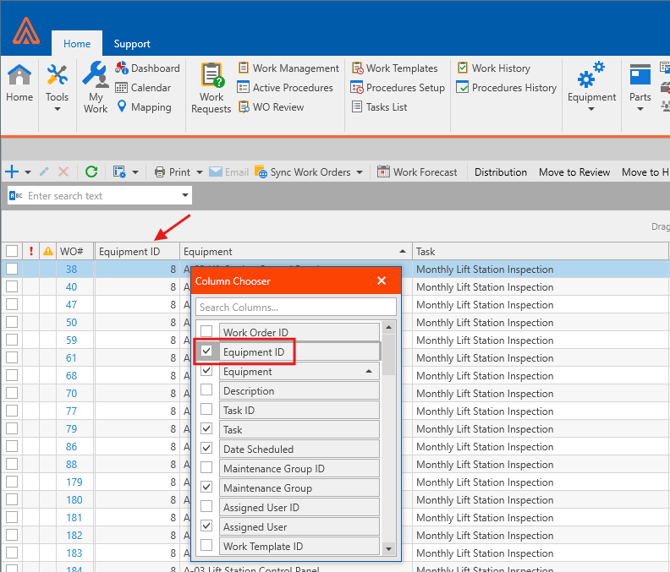
A window will pop up with the option to select additional data that you may want to add to the columns. In my example below, I clicked the tick box next to Equipment ID. Now you can see the Equipment ID Column was added to the list of Columns shown in the Grid View.
Moving Columns
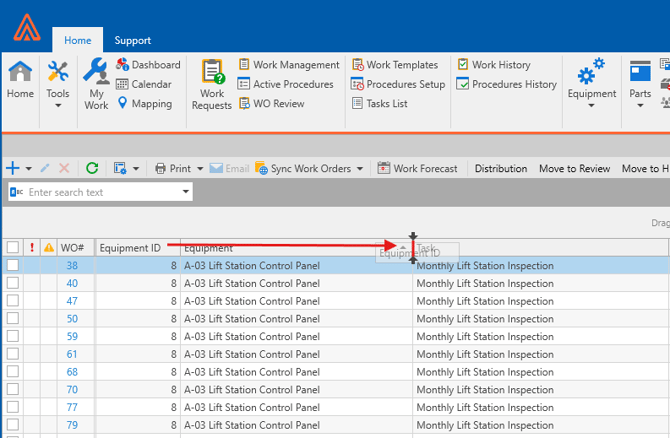
Now that you have all your Columns in place you can choose to organize which Columns you see first by dragging and dropping a column in front of or after another column.
For Example, Lets move the newly created Equipment ID column to show after the Equipment Column by Clicking on and dragging the Equipment ID between the Equipment and Task Columns. You will see two arrows pointing at the line between the two columns indicating you are dropping the column in the correct location.
Filter Editor
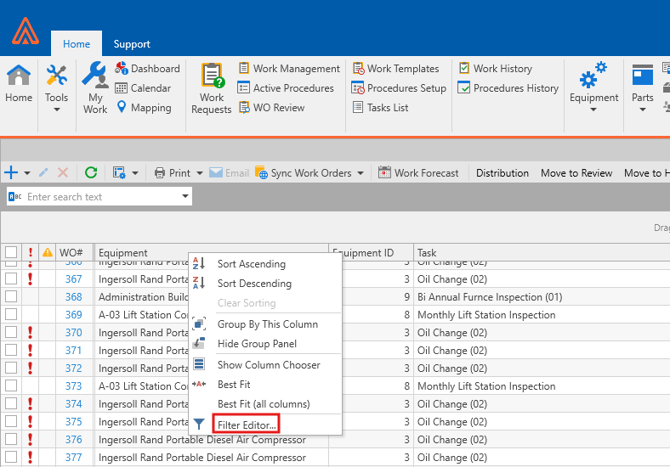
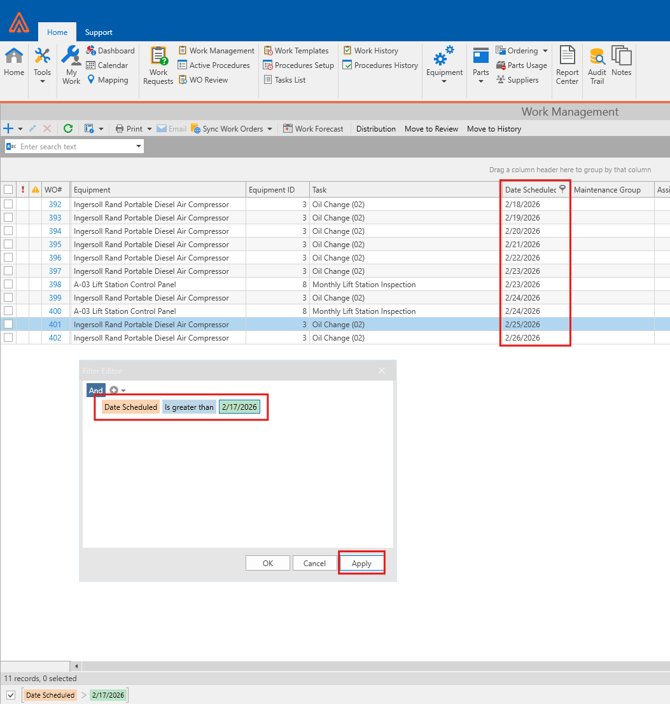
Lastly, we have the Filter Editor Option by right clicking a column and choosing Filter Editor at the bottom.
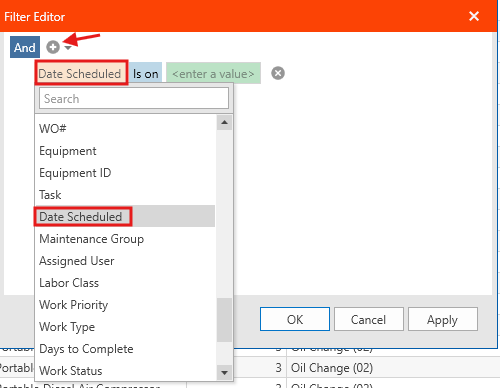
After selecting this option the Filter Editor window will pop up. Here you can sort the Work Orders using Logic. For Example, we can click on the + next to "And" to create a Condition. Let's try to sort for Work Orders scheduled after a specific date. We could do this by changing the first condition to Date Scheduled by clicking on the condition and selecting Date Scheduled from the List.
Next we can click on the second condition to switch to "Is greater than" because we are specifying that we want to filter for a Date Scheduled that Is greater than the specified date.

Lastly, We can select a data range by clicking on the "enter a value' condtition.
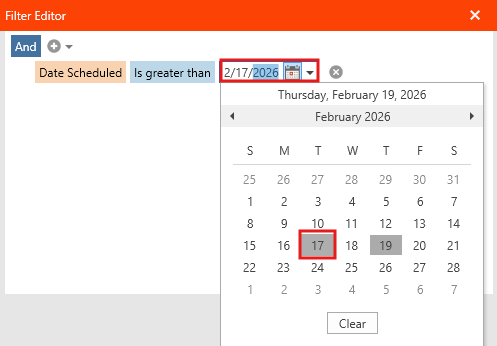
After our condition is created we can click Apply to only show the Work Orders that match our conditions. As you can see from the example, only work orders that were scheduled after 2/17/2026 is now showing in the Grid view.
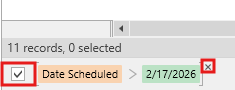
The filter you created will show at the bottom of the Grid view and can be ticked on or off at any time. You can also delete the Filter by hovering over the filter and clicking the X.
As you can see the Filter Editor can be a very powerful tool for filtering data in the Grid Layout. I recommend you experiment with different conditions to create filters that can help you with your Work Flow. Remember, you could always delete a filter if it doesn't look correct. You will not lose any data using this tool, it is safe to experiment and delete filters as needed.